
How to Make a DIY 18 Inch Doll 80s Walkman (Walkdoll) with Headphones

The new 80s American Girl Doll of the Year is out and we have the perfect DIY accessory project to go with her, the classic 80s Walkman modified and scaled down into the SON-AG Walkdoll!
This project can be made with three items from Dollar Tree and a few crafting supplies you probably already have around the house.
From the Dollar Store (we went to Dollar Tree) you will need: Happy Birthday Tiaras, Plastic Earbuds and Chalkboard Signs (the Chalkboards come with stokes as shown or some have clothes pins - either will work).

You will also need scissors, black 6mm craft foam, your choice of color 2mm craft foam, clear tape, a metal duckbill hair clip, nail polish remover, hot glue gun (optional but reccomended), and a toothpick.
Finally, just click here download the free PDF version of the project that includes the printable you'll use with this project.

Okay, let's get crafting!
Step 1: Apply nail polish remover to a cloth rag and soak the part of the sign where the stick is glued.

Step 2: Eventually the nail polish remover will soften the glue enough to where you can easily remove the stick. Be patient. Some come right off but it can take some time to loosen the glue on others. Do this twice: once for the front and once for the back.

Step 3: Position one sign on the corner of a sheet of craft foam and use something sharp to trace the lines of the of the other two sides. Bear down to create a groove in the craft foam.

Step 4: Cut out the rectangle you just traced. If you make a deep imprint by bearing down hard in step 3, it will be cleaner and easier to cut here.

Step 5: Use hot glue to secure both chalkboards to the front and back of the craft foam rectangle. Since we are taping everything together later, you can skip this step, but we find it’s much easier to do the rest of the project if you do glue all this together now.

Step 6: Print and cut out the printable included in this PDF. Cut along the outside edges and cut slits where the 4 dotted red lines are. Click here to download the PDF if you haven't already.

Step 7: Fold the cut out printable along the edges and bend down the flaps as shown here.

Step 8: Use a small clear tape to secure the printable like you’re wrapping a present (small pieces to just to hold it in place). Then cover the entire thing with bigger packing tape so there are no tape seams on the front face.

Step 9: Take the Happy Birthday Tiara, remove the cardboard Happy Birthday and cut long ways up the band to make a slimmer band that only includes one of the two metal strips.

Step 10: Cut through the remaining metal band to create a head pieces approximately 8 inches from end to end. If you have a small metal cutter, it’s easier to use those, but this step can be done with (non-fabric, of course) scissors too.

Step 11: If you have one, use a small cookie cutter to create the circle for the outer headphones cushion out of 6mm craft from. Again, the bigger groove you can make, the easier it is to cut out cleanly with scissors.
If you don’t have cutter, just trace a coin or any size circle you can find that will work.

Step 12: Cut out the circle and use a nail file to clean the edges if necessary. Repeat steps 11 and 12 for the other outer cushion.

Step 13: Repeat steps 11 and 12 with the colored 2mm craft foam for the inner cushions of the headphones.

Step 14: Cut the earbuds cord approximately 12 inches from the plug and split down the middle about 3-4 inches and splice.

Step 15: Sandwich the outer 6mm craft foam cushions, the headband, the cord ends and the inner 2mm craft foam (in that order) and hot glue together.

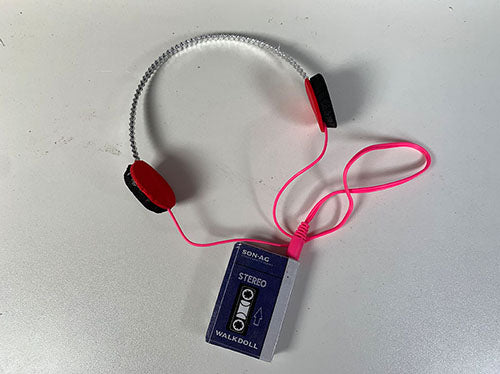
Finished headphones and cord.

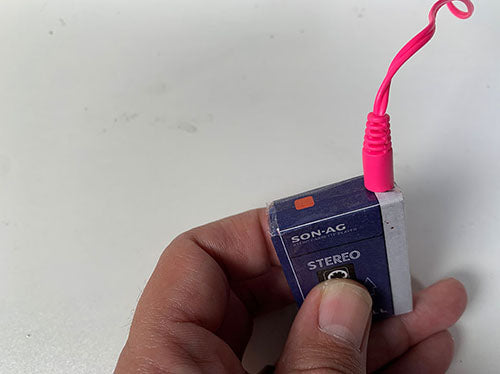
Step 16: Poke a hole where the orange dot is using a toothpick or anything sharp enough. Tip: we used a sewing pin to poke a bunch of small holes there to make it easier to puncture the craft foam with a toothpick.

Plug fit snuggly in the top of the Walkdoll.
Step 17: Hot glue the metal duckbill clip to the back of the Walkdoll so your doll can clip it to her belt or sash. If you don't have a hot glue gun, you can always use tape to attach the back side of the clip.

You’re done! This is how the finished project will look :)
Now that you have your Walkdoll and Headphones, finish off the exercise outfit with these sewing patterns...
 |
 |
 |